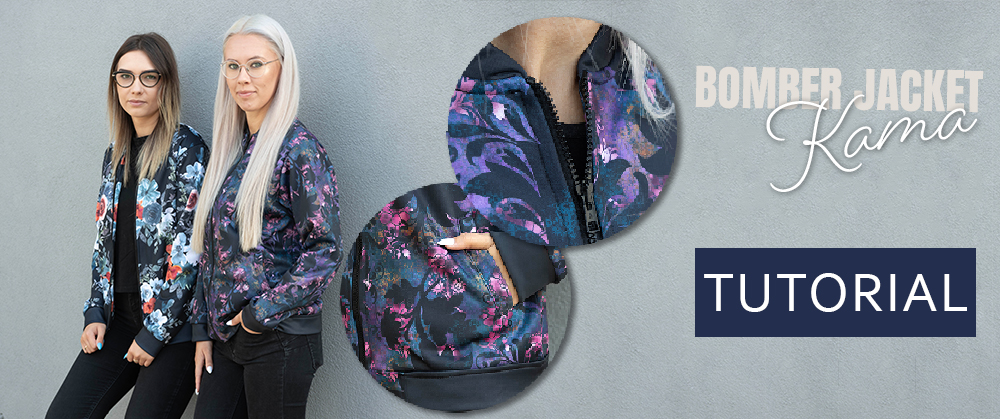
18/08/2022
| in category:Bomber jacket
To sew a bomber jacket you need to prepare:
- DIY set from dresówka.pl
- multifunction machine, a serger (use knitting needles (90), and if you have microtex needles - they work perfectly for this fabric),
- scissors, pins, clamps, unstitcher, tailor's chalk,
- interlining (will come in handy for reinforcing the pockets).
In the set you will find:
- a cut-out of a bomber jacket printed on soft sports knitwear.
- a zipper
Preparation:
1. Cut out the elements of the bomber jacket:
- 2x front of the bomber jacket
- 1x back of the bomber jacket
- 1x long bottom hem piece
- 2x short bottom hem piece
- 2x sleeve
- 2x sleeve cuff
- 1x neckline stand-up collar
- 2x front drape
- 1x neck drape
- 2x pocket flap
- 4x pocket bag elements (2x larger element, 2x smaller element)
If you decide to reinforce the pocket with interlining then cut these elements out of it:
- 2x the pocket flap,
- 4x pocket bag elements (2x larger element, 2x smaller element),
and iron it onto same elements of the knitwear.
2. The pocket in the bomber jacket consists of 3 elements: a flap, a smaller pocket bag element and a larger pocket bag element.

3. On the elements of the front of the bomber jacket, you will find printed area where the pocket should be sewn. Determine the midpoint of this rectangle and draw a long line through it.

4. Fold the pocket flap and attach it to the drawn line, so that the marks on it are aligned with the ends of the rectangle. Attach the LARGER pocket piece to the other side of the line. Its lower part should point upwards.


5. Sew the flap and pocket. Make sure the lines of the rectangle are within the seam allowance (try to sew along them).


6. Cut the rectangle along the drawn line, and make cuts at the ends of its corners as shown in the photo.

7. Turn the pocket and the flap inwards.

8. The triangles formed during the cutting of the pocket got to be turned upwards.

9. Sew a LARGER portion of the pocket bag to the seam allowance of the flap.

10. It's a good time to overlock the seams connecting the pocket pieces to the front of the bomber jacket.

11. Make sure that the ''triangles'' are facing the bottom of the jacket. Pin them in place with pins.


12. Quilt the pocket flap. In the photo this is done on all sides. However, leave it open on the side where you put your hand in.

13. Fold the pocket bag, directing the pieces to the bottom of the bomber and then sew it using a serger.

14. Quilt the last side of the flap and the pocket is ready.

Draping
15. Fold the front and neck drape together, stitch the outer edge of the resulting piece with serger.


Sewing together the elements of a bomber jacket
In this tutorial (section 7) we have shown very precisely how to sew a sweatshirt using this method: https://dresowka.pl/en/blog/zipped_sweatshirt_with_stand_up_collar/
16. Fold the back and fronts of the bomber together (right side to right side) then stitch at the shoulders. Sew the sleeves, but pay attention to the markings when pinning (the sleeves are not symmetrical).

17. Sew the sides of the bomber jacket starting from the sleeve, ending at the bottom of the jacket. Take care to place the seam allowances crosswise under the armpit.

18. Sew the cuffs to the sleeves.
Bottom welt
19. The bottom welt consists of 3 parts. Join them together as shown in the picture.

20. Pin the unfolded bottom welt to the bottom of the jacket, right side to right side. NOTE: Pin and sew the short pieces flat, i.e. without stretching. Stretch and adjust only the long welt piece. We recommend sewing it in two stages - each time starting with the piece that should not be stretched, ending in the middle of the back.


21. Hem the bottom of the welt with a serger.

Zipper
22. Pin the zip to the front of the jacket with pins or buckles. Start at the bottom of the markings you will see halfway down the welt.

23. Sew in the zipper using a zipper sewing foot

24. Pin the other side of the zip. Make sure both sides are symmetrical before sewing. When sewing, focus on not stretching the fabric and sew it exactly as it is pinned.
Stand-up collar
25. Fold the stand-up collar along the longer edge left sides together. Mark its midpoint and cut a small incision here. Mark the center of the rear neckline and make a small incision here, too. Pin the stand-up collar to the neckline. Remember to keep the incisions even.

26. Remember also to keep the zipper "folded" for now, i.e. its right side facing the right side of the jacket. Sew a stand-up collar onto the folded zipper like this.

Joining together the drapings and the bomber jacket
27. Pin the drape to the bottom of the welt and sew. Do this on both sides.

28. Fold the bottom welt together with the sewn drape upwards (right side to right side), so that the fold matches where the zipper starts. Pin around the whole drape and sew it on. Remember to skip the bottom part.


29. Sew the end of the zipper where it joins the collar at a straight angle. Cut the corner of the seam allowance.

Quilting
30. Fasten the bottom welt such way that the seam allowance connecting the pieces faces downwards and the overlocked bottom of the welt faces upwards. Quilt.

31. Quilt the zipper and stand-up collar.

32. You can also quilt the seam joining the elements of the bottom welt.

Done!


Iwona Bartczak
Małgorzata Michalewska
Post Comments (0)
To add a comment, you must be a registered customer.
click here to log in


