
The Dress "Isabella" and "Mia"
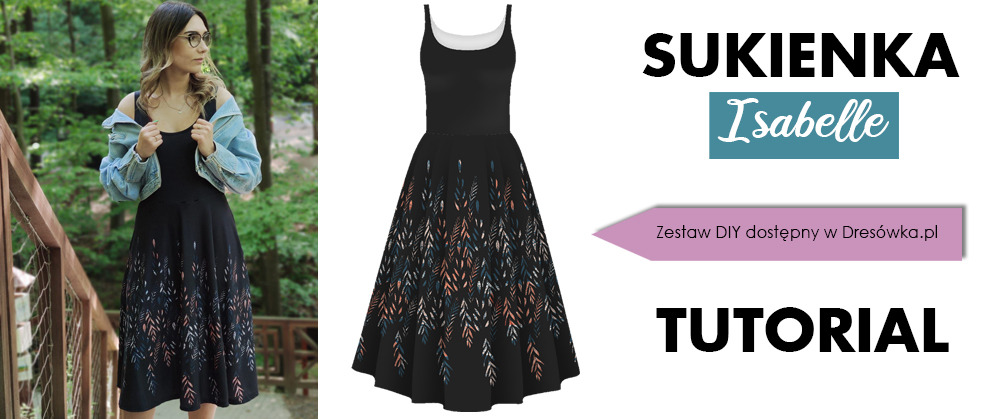
Here it is - Isabella. Elegant, yet comfortable at the same time. For special occasions and everyday wear. Beautiful and simple to sew. For all women, because each of us looks stunning in it.
PREPARE:
- DIY set for the dress
- Multifunction machine (if you have a serger and coverlock, prepare them as well)
- 70 or 80 gauge knitting sewing needle
- scissors, clamps, pins
{{useMaterials}}
CUTOUT:
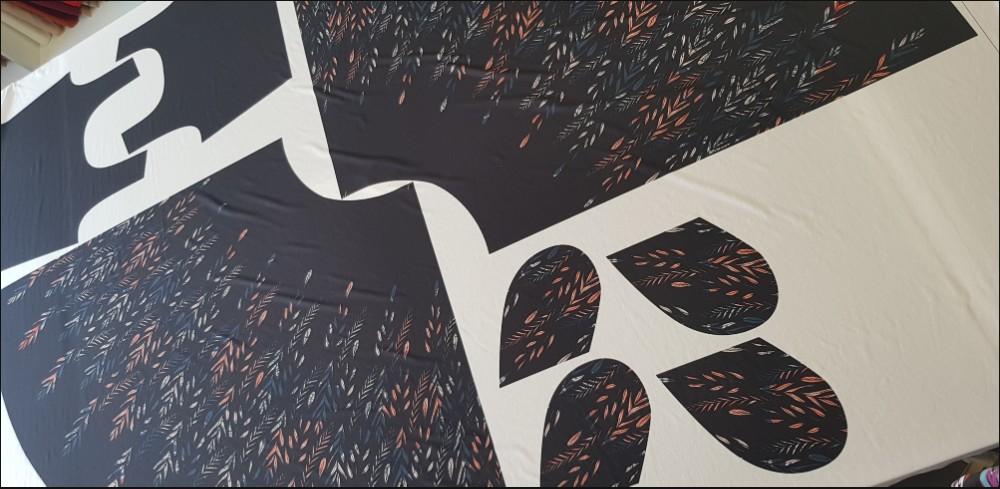
Cut out the elements of the dress
- 1x front
- 1x back
- 2x quarter circle for skirt
- 4x pocket bag element
SEWING:
POCKETS
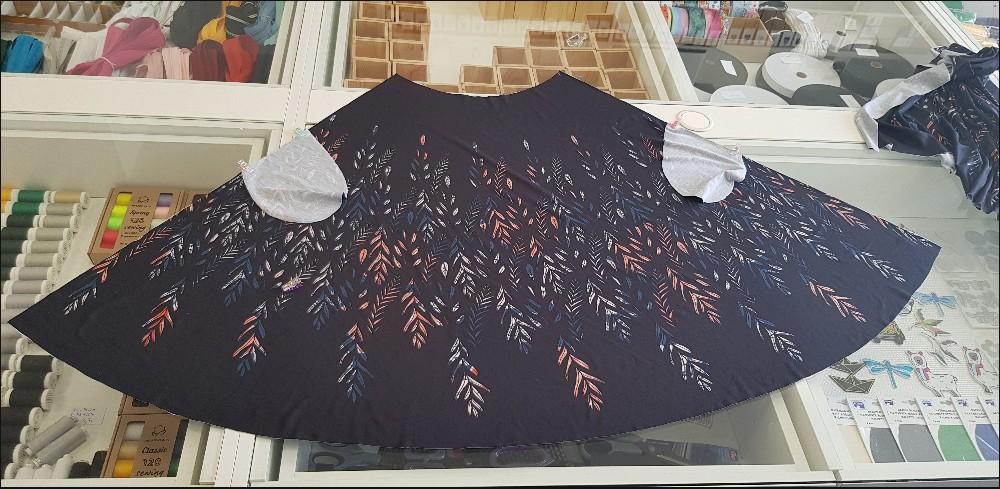
The skirt consists of two parts. Lay one of them out flat and pin the pocket bags on the sides according to the markings on the fabric. Pin them right side to right on both sides and sew them (pocket edge to skirt edge). Do the same with the other part of the skirt.
SKIRT
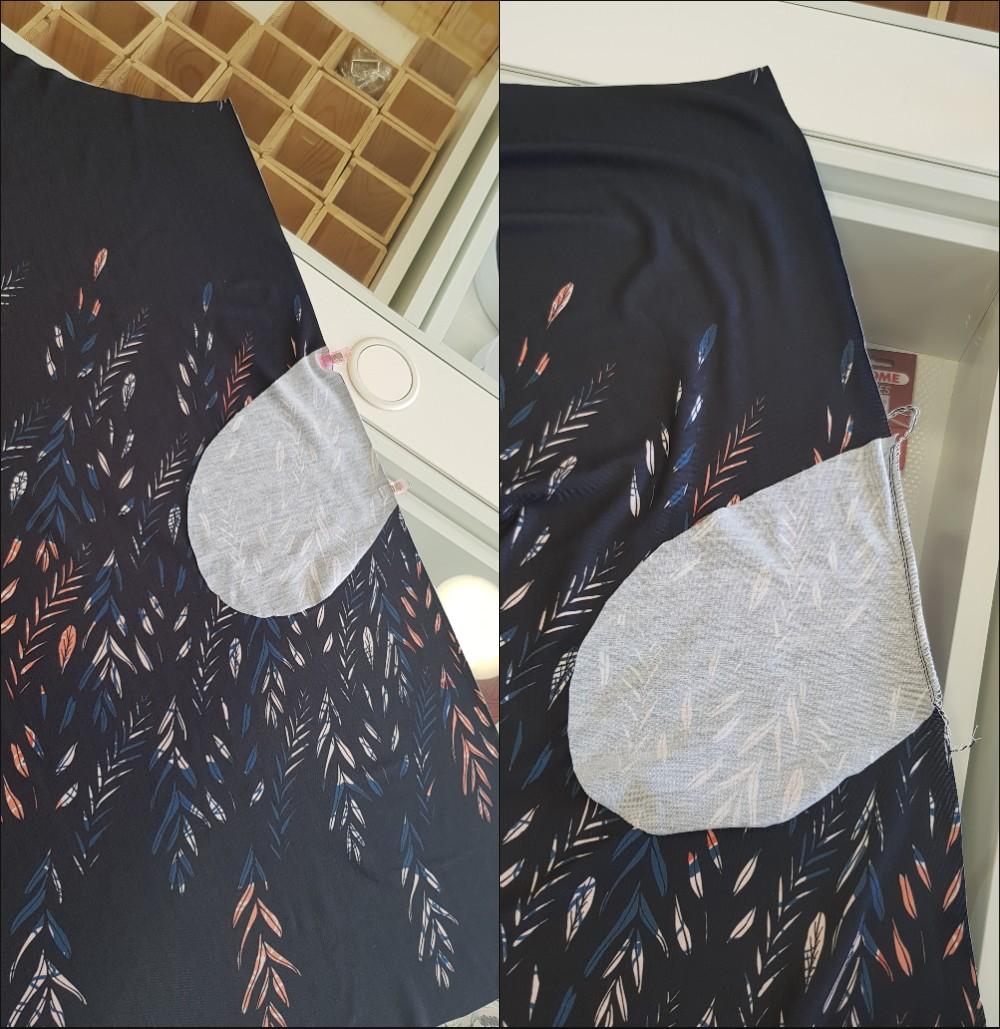
Put the two halves of the skirt on top of each other. Lay out the pocket bags as shown in the photo. Pin the sides of the skirt and pocket bags together.
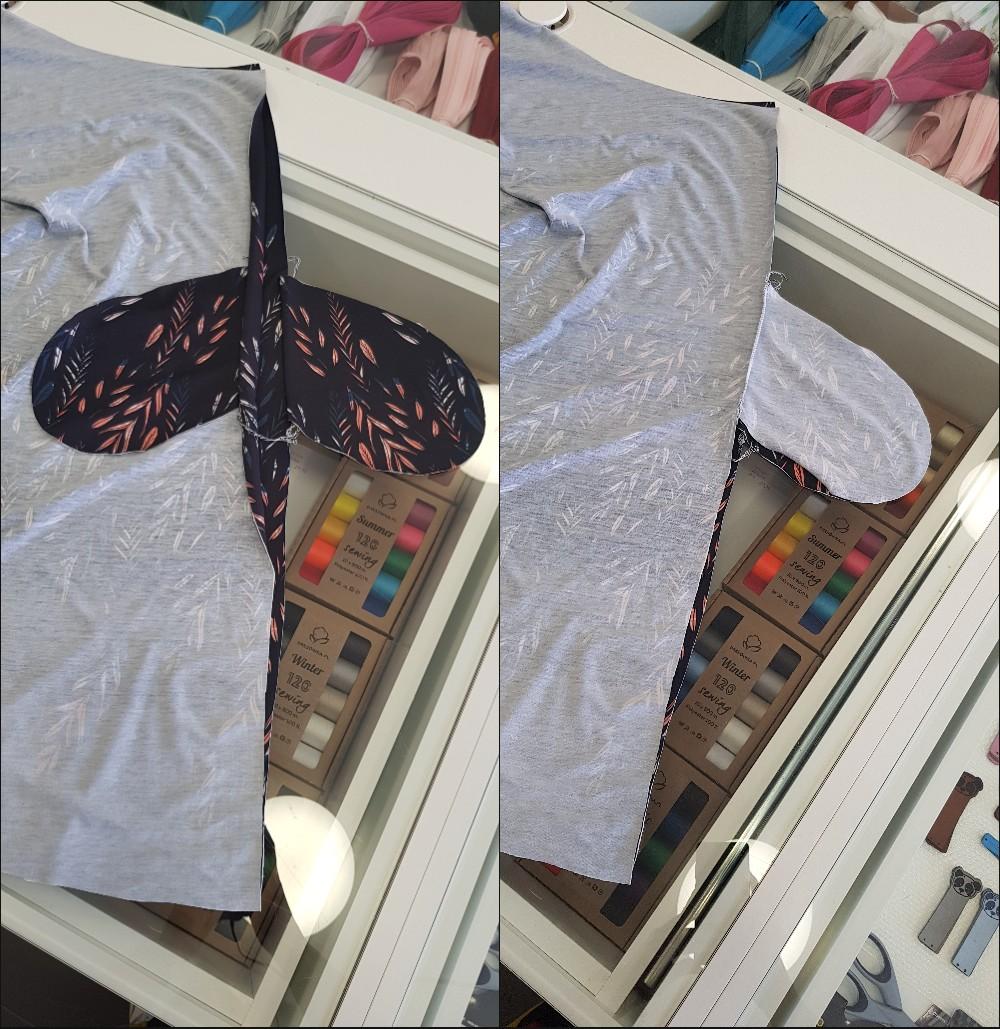
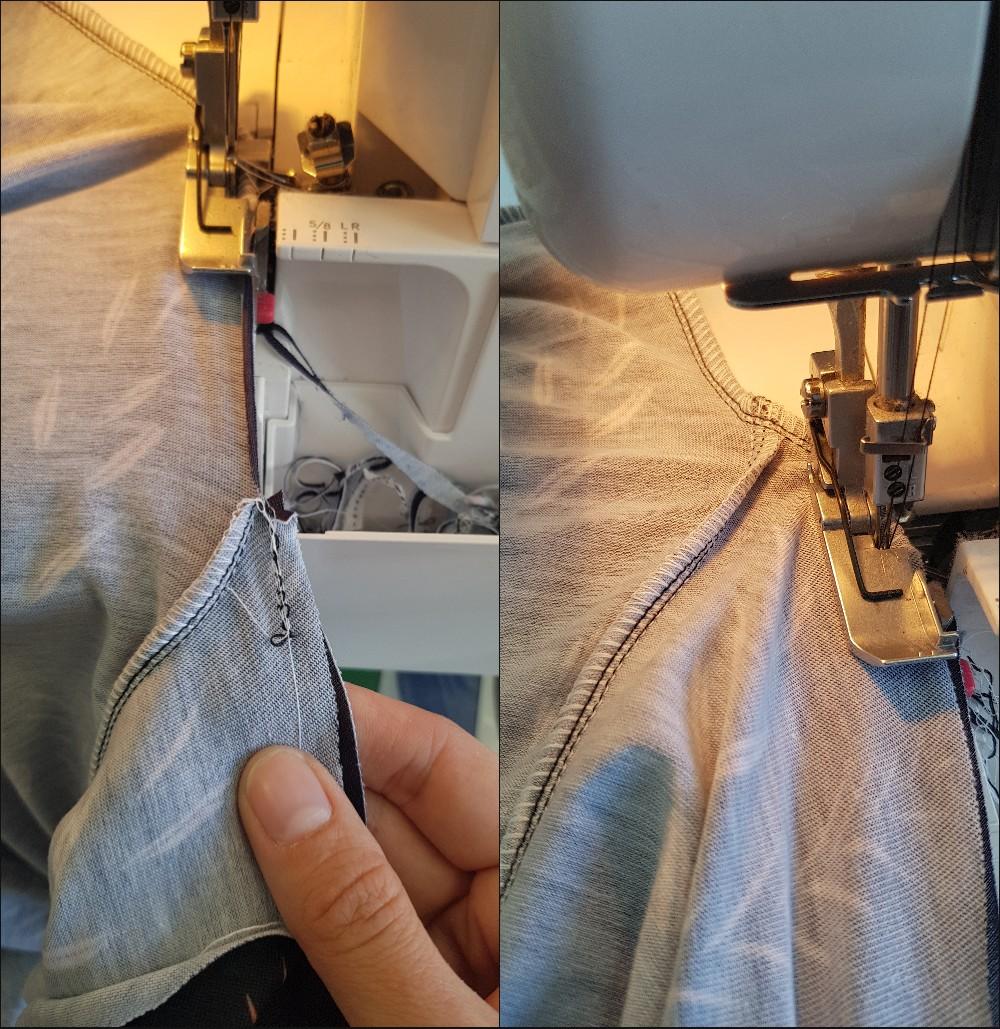
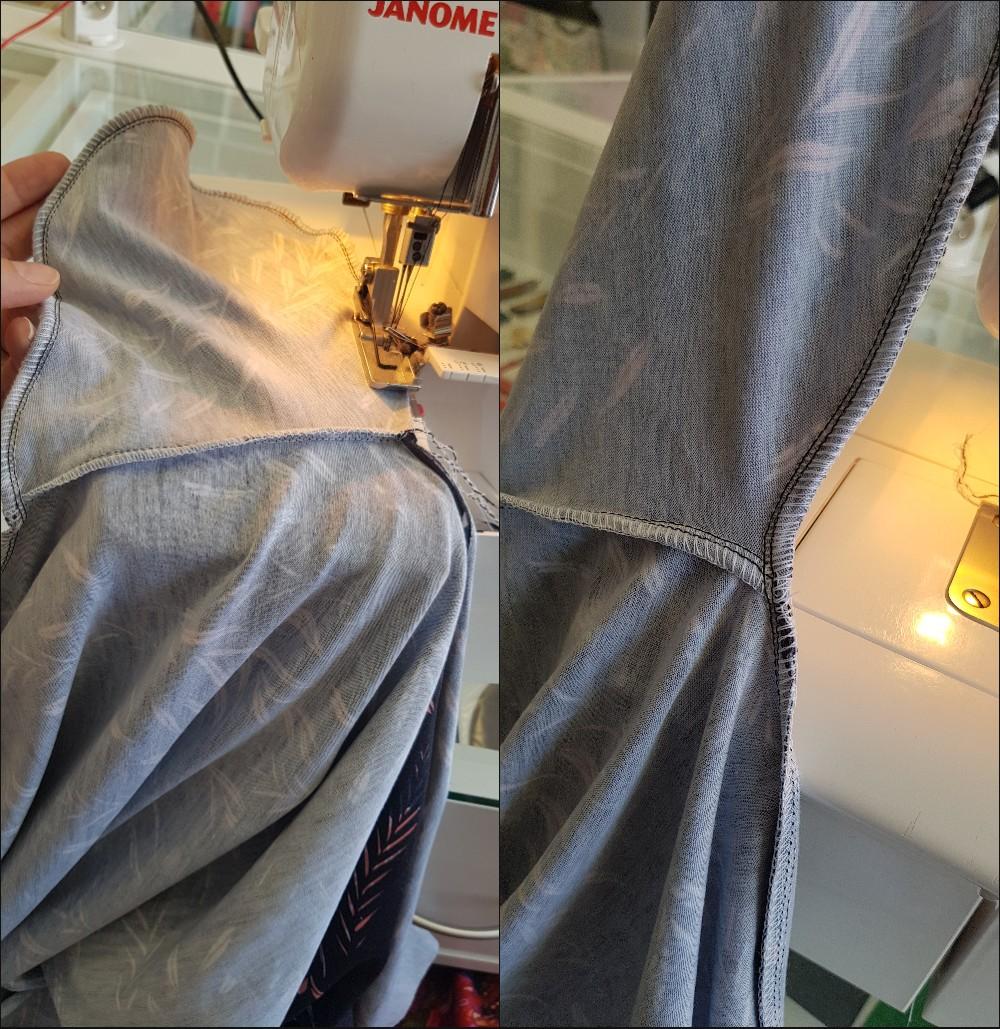
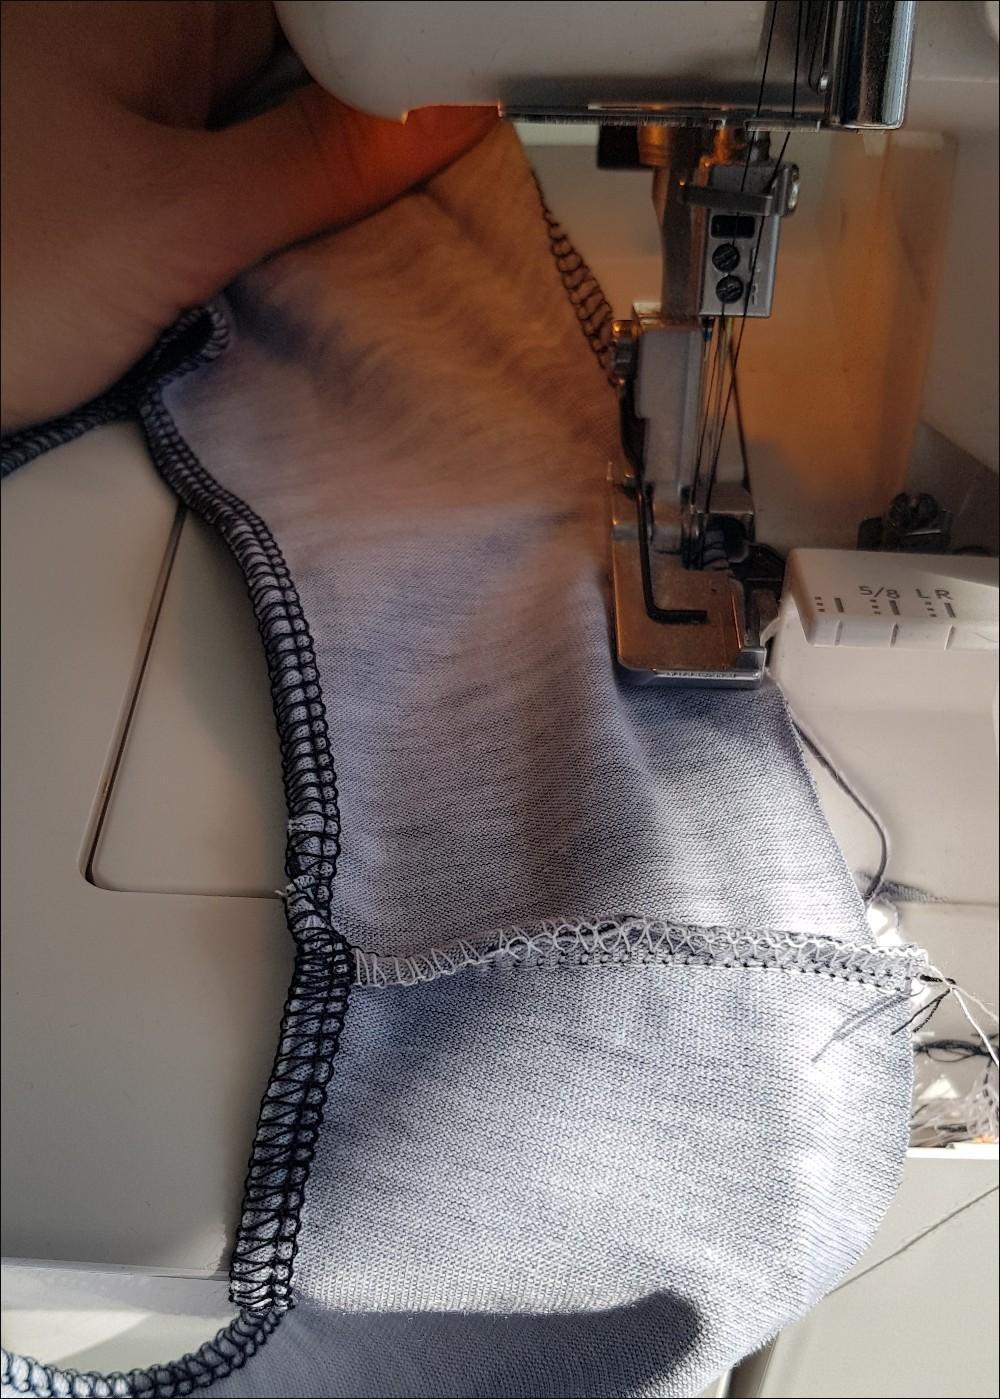
Sew the sides of the skirt together. NOTE: When you get to the pocket bag, lay out the fabric so that you can sew as straight as possible. This is extremely important especially when you are sewing on a serger with the knife on. Forget for a moment that you have angles at the pockets, position the fabric in a way that you have a straight line to sew.
TOP
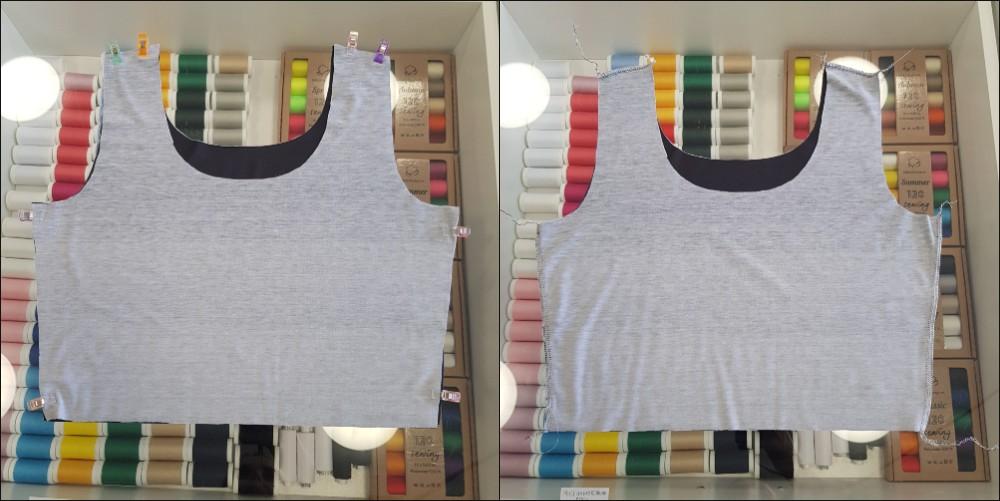
Lay the front and back of the blouse on top of each other right side to right side, pin together and sew at the shoulders and sides.
SLEEVES - ONLY IN THE 'MIA' MODEL
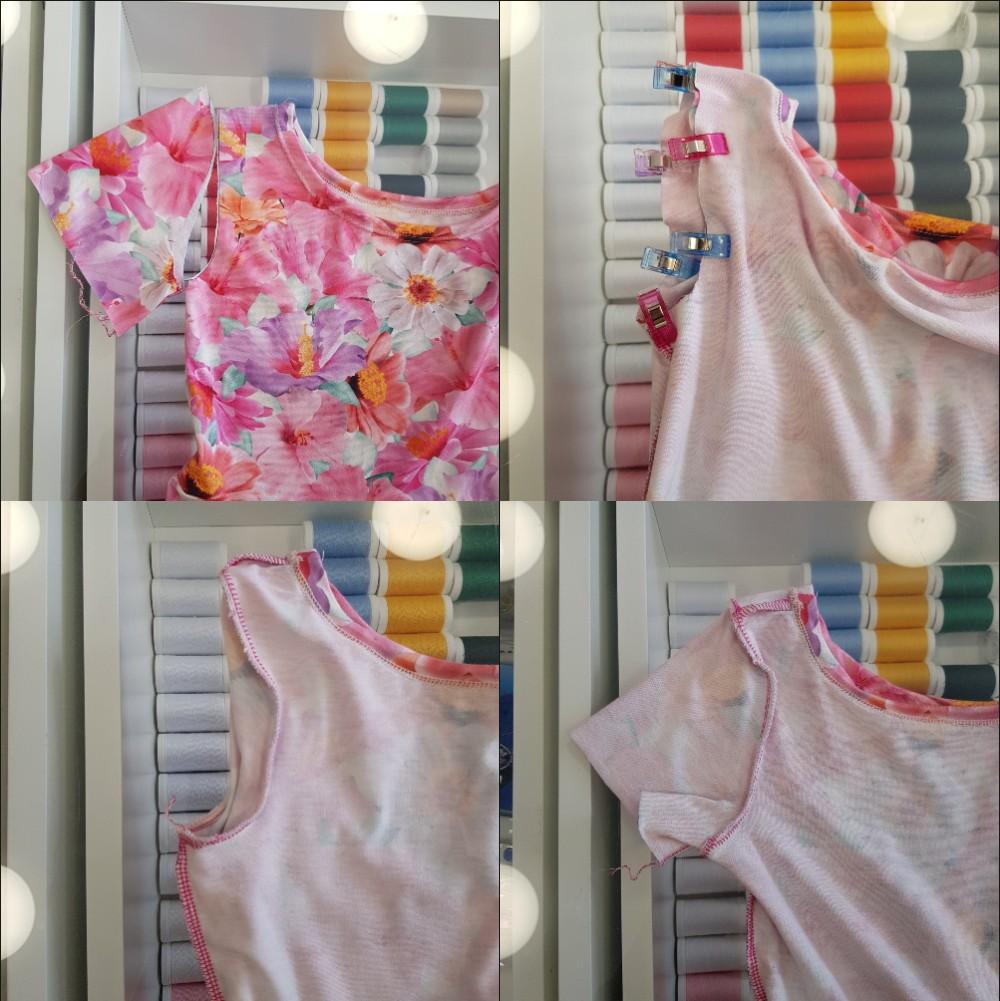
Sew the bottom part of the sleeve (the shortest of the sides, under the arch) together. Turn the blouse to the left side, and the sleeve to the right side. Insert the sleeve into the armpit right side to right side so that the seams of the two meet. Pin the two pieces together and sew along the circumference.
JOINING THE ELEMENTS OF THE DRESS
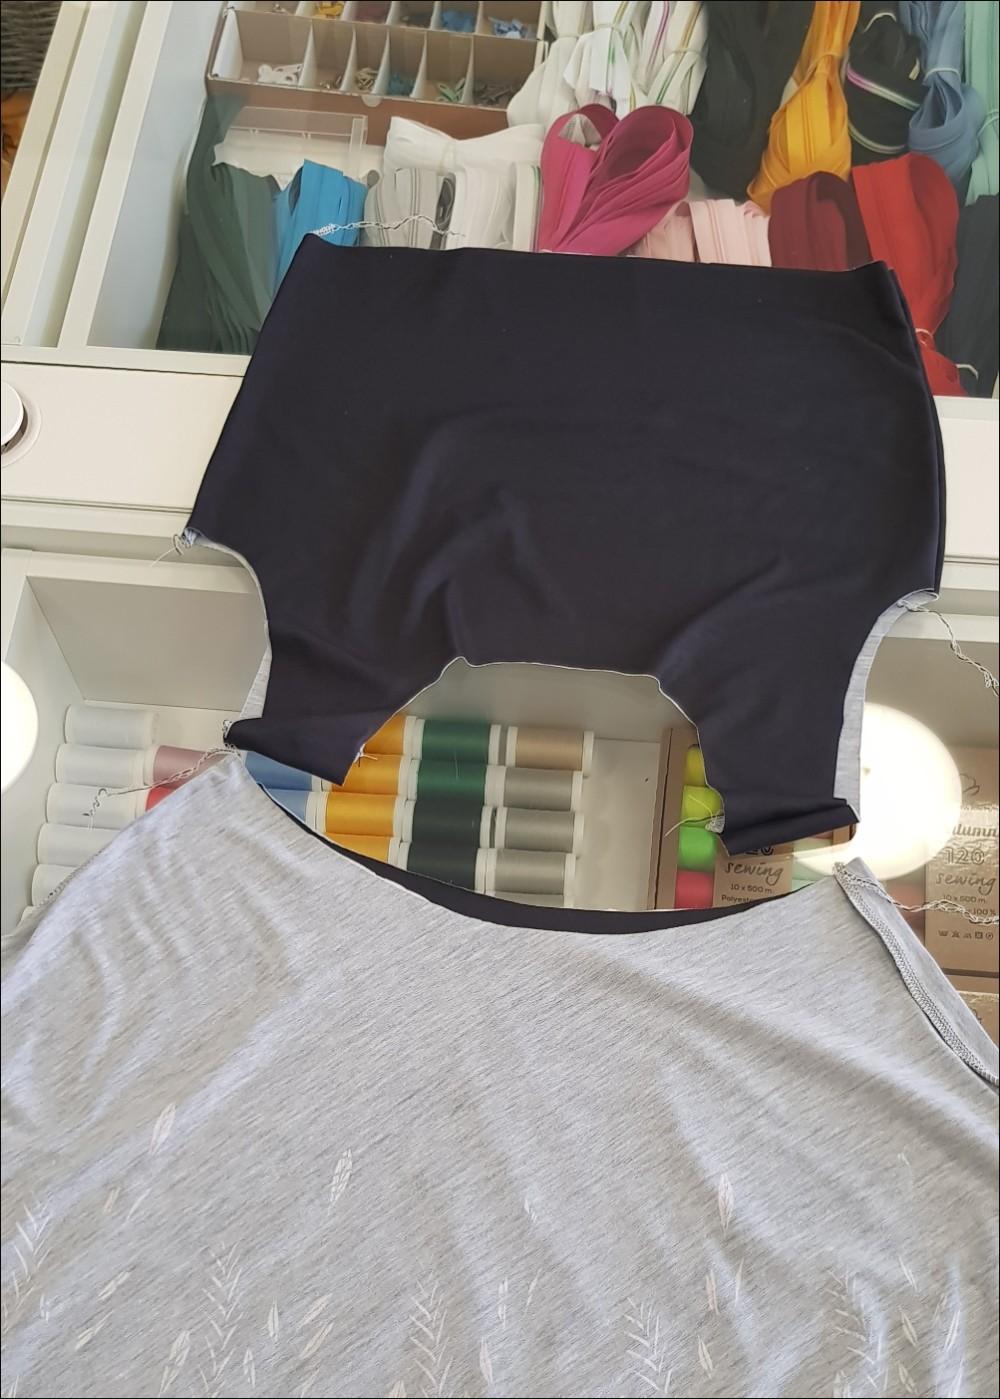
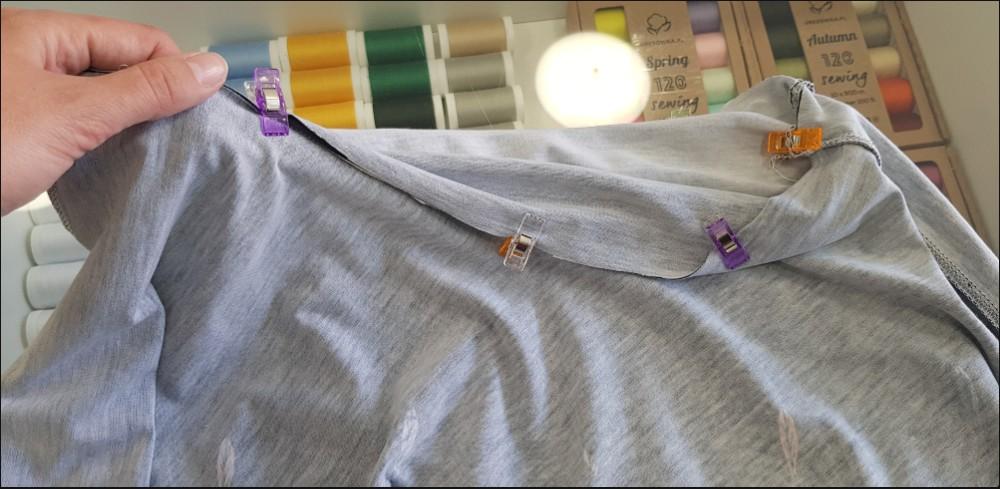
Leave the skirt on the left side, turn the blouse to the right side. Insert the blouse into the skirt, so that the two elements meet on the right sides. Align the side seams of both pieces so that they form a straight line. Join the skirt and blouse together with pins or clothespins. Sew. It is a good idea to do this with an overlock stitch on a multifunction machine.
TUCKING
If you have a coverstitch machine - tuck the bottom, neckline and armpits in the dress with it (I recommend sewing with two needles). You can also use a double needle on a multifunction machine for this purpose. Remember - you are sewing along the curves of the elastic fabric. When sewing, stretch it gently.
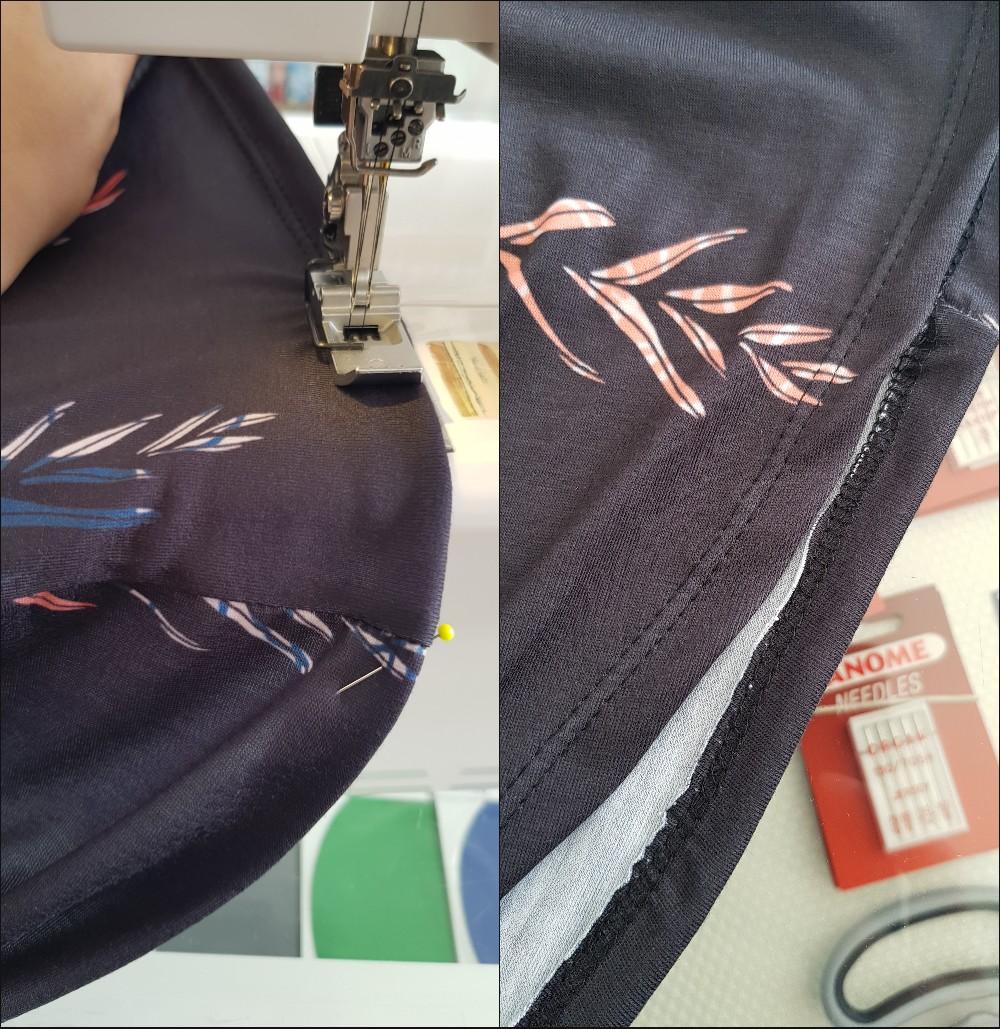
You can also hem the edges of the bottom of the skirt, the neckline and the armpits on the serger and tuck them with the multifunction machine. Remember then not to stretch the fabric too much when sewing on the serger. When you'll be tucking the hemmed edge on the multifunction machine, I recommend gently stretching the fabric.
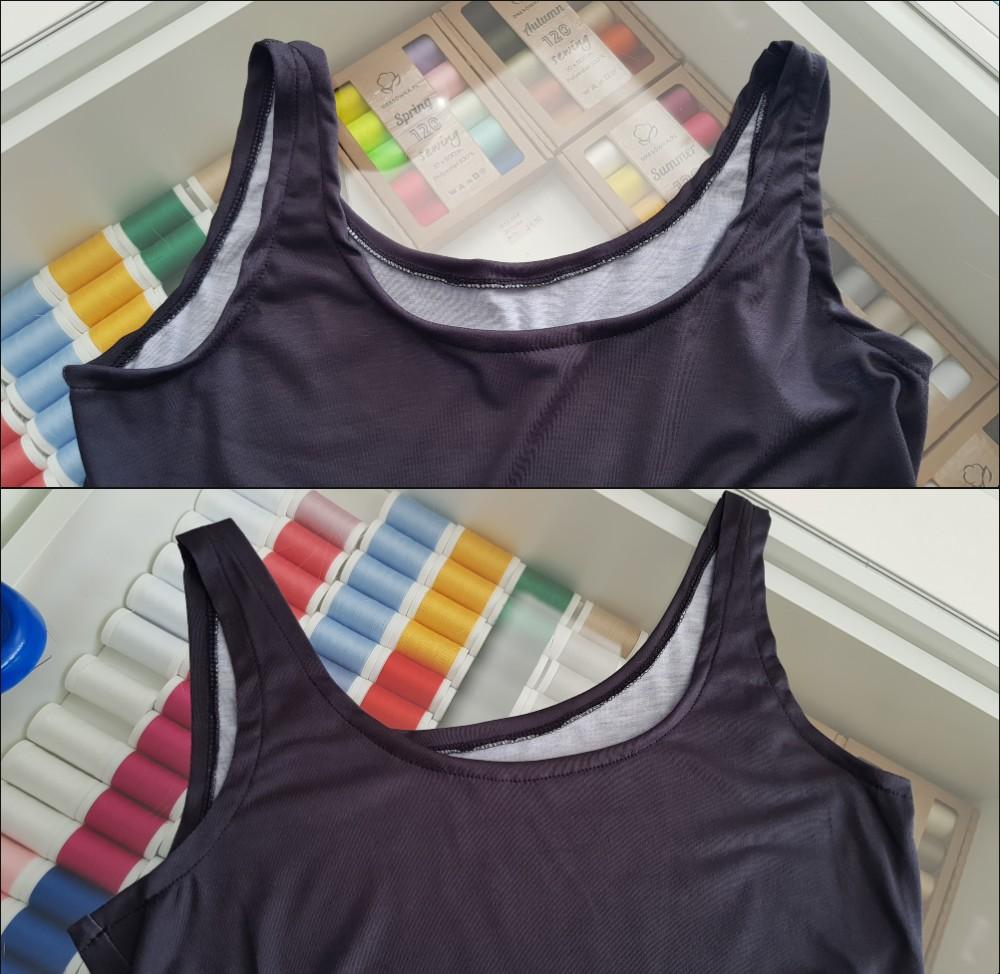
When you tuck the curves in this way, it can cause the tucked edges to ripple. Ironing with lots of steam will solve this problem.
If you don't have a serger, your multifunction machine surely has decorative stitches. Try them out on the fabric offcuts from the panel and confidently use chosen stiches to tuck your dress.
Doesn't it look beautiful?
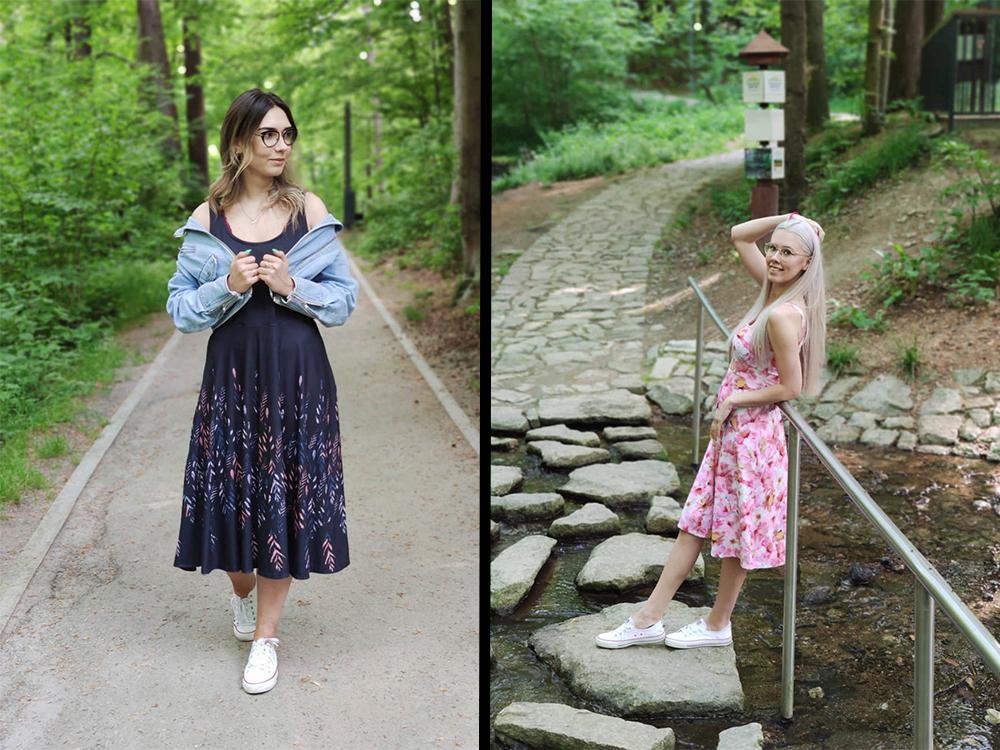
Thanks for sewing with us
Gosia Michalewska
Recommended


DRESS "ISABELLE" - WILD ROSE FLOWERS PAT. 1 (BLOOMING MEADOW) (Very Peri) - sewing set

DRESS "ISABELLE" - WILD ROSE FLOWERS PAT. 1 (BLOOMING MEADOW) (Very Peri) - sewing set XXL

DRESS "ISABELLE" - WILD ROSE FLOWERS PAT. 1 (BLOOMING MEADOW) (Very Peri) - sewing set XL

DRESS "ISABELLE" - WILD ROSE FLOWERS PAT. 1 (BLOOMING MEADOW) (Very Peri) - sewing set L

DRESS "ISABELLE" - WILD ROSE FLOWERS PAT. 1 (BLOOMING MEADOW) (Very Peri) - sewing set M

DRESS "ISABELLE" - WILD ROSE FLOWERS PAT. 1 (BLOOMING MEADOW) (Very Peri) - sewing set S

DRESS "ISABELLE" - WILD ROSE FLOWERS PAT. 1 (BLOOMING MEADOW) (Very Peri) - sewing set XS


KID'S DRESS "MIA" - LADYBIRDS IN THE MEADOW (IN THE MEADOW) - sewing set (122/128)

KID'S DRESS "MIA" - LADYBIRDS IN THE MEADOW (IN THE MEADOW) - sewing set (146/152)


KID'S DRESS "MIA" - UNICORNS AND FLOWERS pat. 2 (WONDERLAND) - sewing set (98/104)

KID'S DRESS "MIA" - UNICORNS AND FLOWERS pat. 2 (WONDERLAND) - sewing set (110/116)

KID'S DRESS "MIA" - UNICORNS AND FLOWERS pat. 2 (WONDERLAND) - sewing set (122/128)

KID'S DRESS "MIA" - UNICORNS AND FLOWERS pat. 2 (WONDERLAND) - sewing set (134/140)


KID'S DRESS "MIA" - BUTTERFLIES PAT. 5 / pink (PURPLE BUTTERFLIES) - sewing set (86/92)

KID'S DRESS "MIA" - BUTTERFLIES PAT. 5 / pink (PURPLE BUTTERFLIES) - sewing set (98/104)

KID'S DRESS "MIA" - BUTTERFLIES PAT. 5 / pink (PURPLE BUTTERFLIES) - sewing set (110/116)

KID'S DRESS "MIA" - BUTTERFLIES PAT. 5 / pink (PURPLE BUTTERFLIES) - sewing set (122/128)

KID'S DRESS "MIA" - BUTTERFLIES PAT. 5 / pink (PURPLE BUTTERFLIES) - sewing set (134/140)

KID'S DRESS "MIA" - BUTTERFLIES PAT. 5 / pink (PURPLE BUTTERFLIES) - sewing set (146/152)


KID'S DRESS "MIA" - KINGFISHERS AND LILACS (KINGFISHERS IN THE MEADOW) / white - sewing set

KID'S DRESS "MIA" - KINGFISHERS AND LILACS (KINGFISHERS IN THE MEADOW) / white - sewing set (86/92)

KID'S DRESS "MIA" - KINGFISHERS AND LILACS (KINGFISHERS IN THE MEADOW) / white - sewing set (98/104)

KID'S DRESS "MIA" - KINGFISHERS AND LILACS (KINGFISHERS IN THE MEADOW) / white - sewing set (110/116)


